Deploy Coolify on a $6 VPS in 15 minutes, timed step by step
Hands-on review. We paid for the plans we tested. Links marked as affiliate links earn us a commission at no cost to you; it never changes what we recommend. Details.
Coolify is the self-hosted alternative to Heroku, Vercel and Netlify: one server, a web UI, push-to-deploy for anything that runs in Docker. The project's own docs say you need 2 CPUs and 2 GB of RAM. We wanted to know whether the $6 DigitalOcean droplet (1 vCPU, 1 GB RAM, 25 GB SSD) is enough for a small team's side projects, so we installed it, timed every step and left it running.
Short version: it works, with one trick (a 2 GB swap file). The install script took 172 seconds, the first app was answering HTTP requests 210 seconds after clicking Deploy, and the measured steps from an empty account to a running app add up to just under 10 minutes (our wall clock said 23, because of a wrong base directory described below and a coffee). Memory after boot sat at 618 MB used with four containers healthy; the build peaked at 720 MB plus 669 MB of swap, which is why the swap file is not optional.
What you need
- A DigitalOcean account. New accounts need a payment method before the first droplet; the droplet is billed hourly ($0.009/h), so a one-hour test costs a cent.
- An SSH key on your machine. If you do not have one:
ssh-keygen -t ed25519 -f ~/.ssh/coolify. - About 15 minutes.
Step 1: create the droplet (1 minute)
In the DigitalOcean console choose Create → Droplets. Pick the region closest to you, then Ubuntu 24.04 (LTS) as the image.
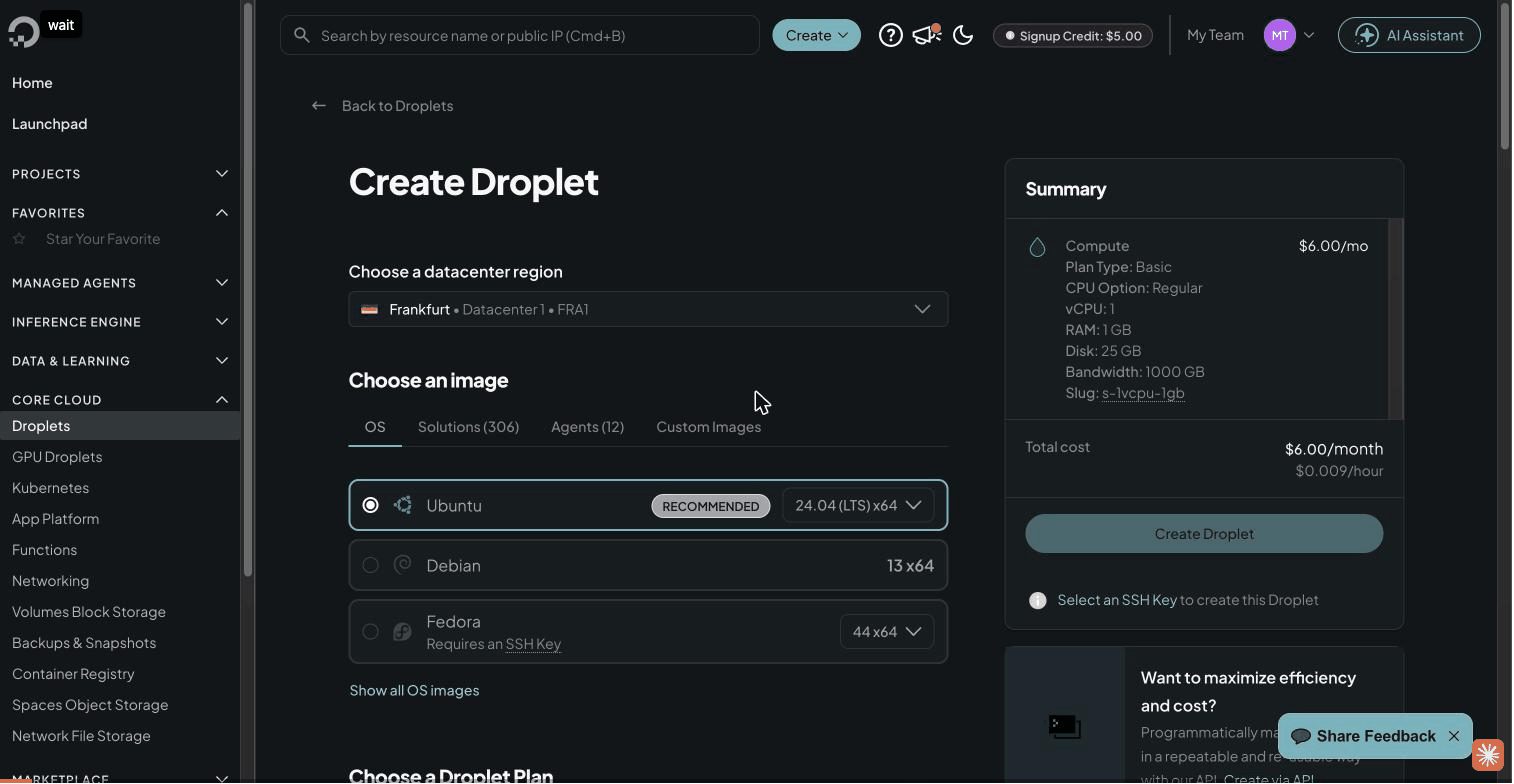
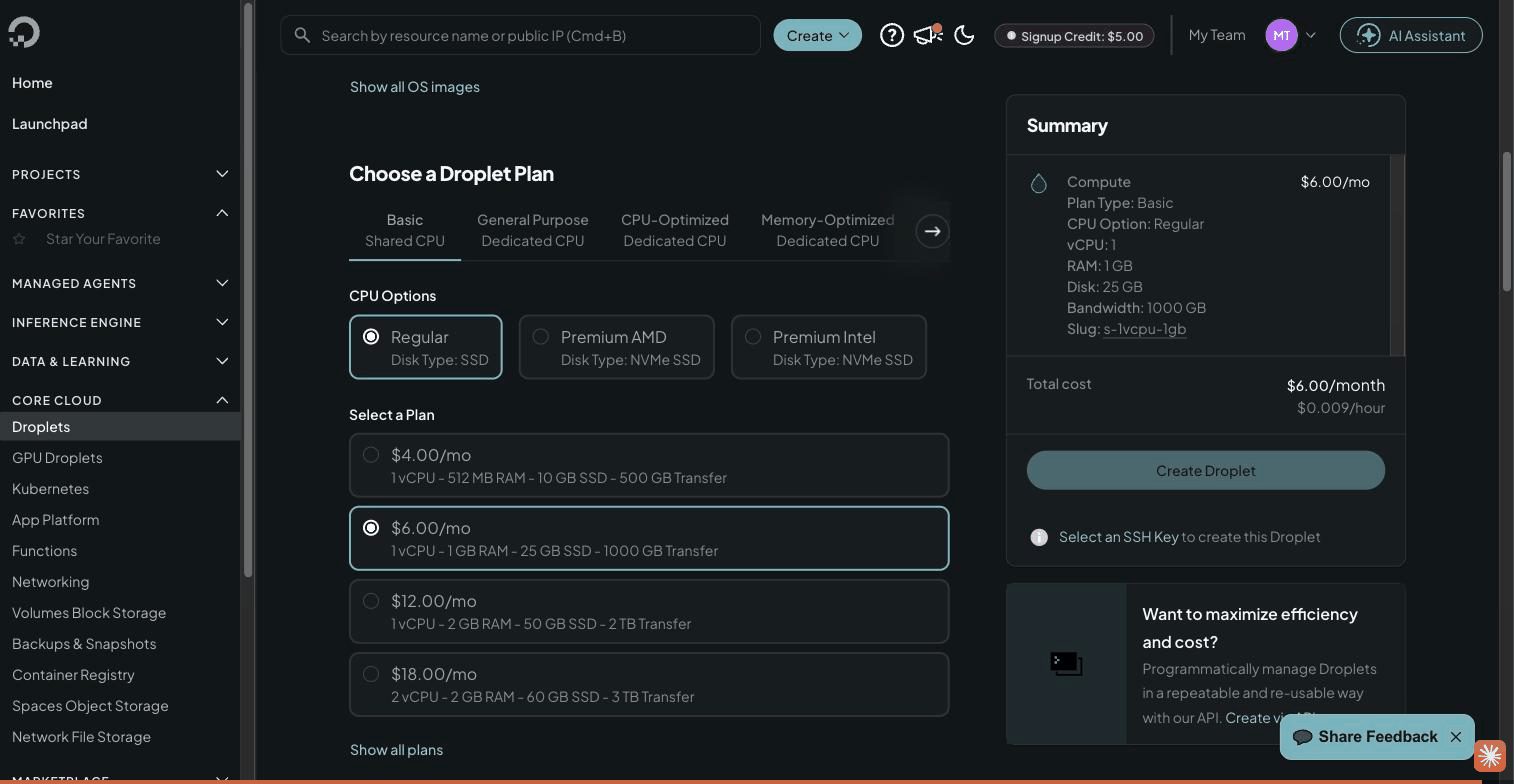
Under Choose a Droplet Plan stay on Basic → Regular and pick the $6.00/mo plan: 1 vCPU, 1 GB RAM, 25 GB SSD, 1000 GB transfer. Skip the $4 plan: 512 MB is not enough for Coolify's four containers even with swap.
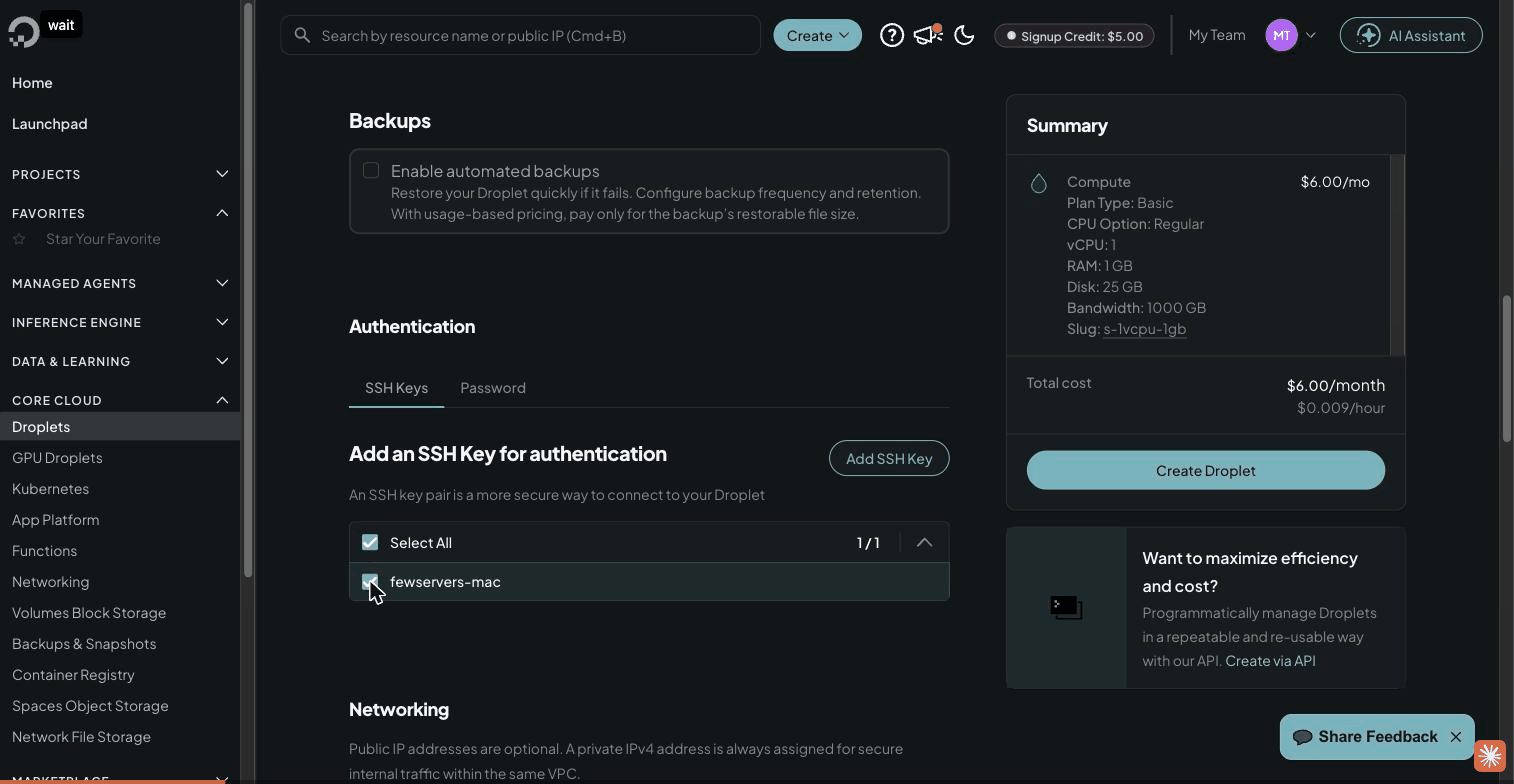
Under Authentication choose SSH Keys and add your public key. Do not use a root password; Coolify itself will later use SSH keys to talk to the server, and password logins are the first thing bots try.
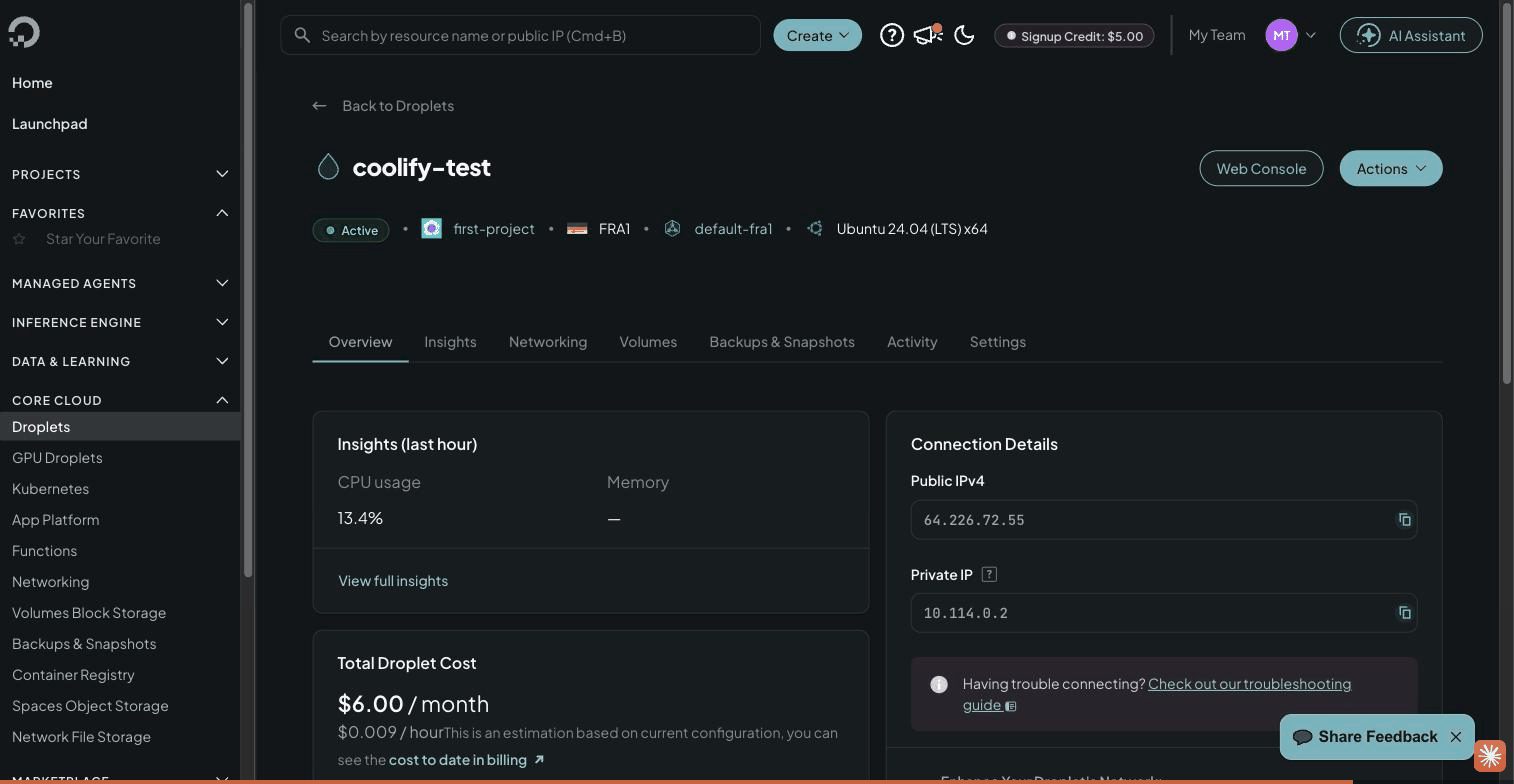
Tick Improved Metrics and monitoring (free), give the droplet a name, and click Create Droplet. Ours showed a public IP after about 60 seconds.
Step 2: add swap (30 seconds)
This is the part that makes the 1 GB plan work. Log in and create a 2 GB swap file:
ssh root@YOUR_DROPLET_IP
fallocate -l 2G /swapfile
chmod 600 /swapfile
mkswap /swapfile
swapon /swapfile
echo '/swapfile none swap sw 0 0' >> /etc/fstab
free -m
Without swap the install still completes, but the first docker build of a real app pushes demand past 1 GB and the kernel kills a container. With swap the build gets slow instead of dying; we measured the peak below (669 MB of swap in use during the build).
Step 3: run the Coolify installer (172 seconds)
One command, from the official docs:
curl -fsSL https://cdn.coollabs.io/coolify/install.sh | bashWe timed it with date before and after. On the $6 droplet in Frankfurt:
| Step | What it does | Time |
|---|---|---|
| 1-2 | OS check, apt packages (curl, wget, git, jq, openssl), SSH config | 6 s |
| 3-4 | Installs Docker 29 and configures the network pool | 57 s |
| 5-8 | Downloads compose files, writes .env, creates the localhost SSH key | under 1 s |
| 9 | Pulls and starts Coolify, Postgres, Redis, the realtime server and the Traefik proxy | 109 s |
| Total | 172 s |
When it finishes it prints Your instance is ready to use! and the URL http://YOUR_DROPLET_IP:8000. Four containers are running:
coolify           Up (healthy)
coolify-db        Up (healthy)
coolify-redis     Up (healthy)
coolify-realtime  Up (healthy)
Memory right after the install: 618 MB used of 961 MB, swap 32 MB. Disk: 7.1 GB used of 24 GB (Docker images are the bulk of it).
Step 4: create the root account and finish onboarding
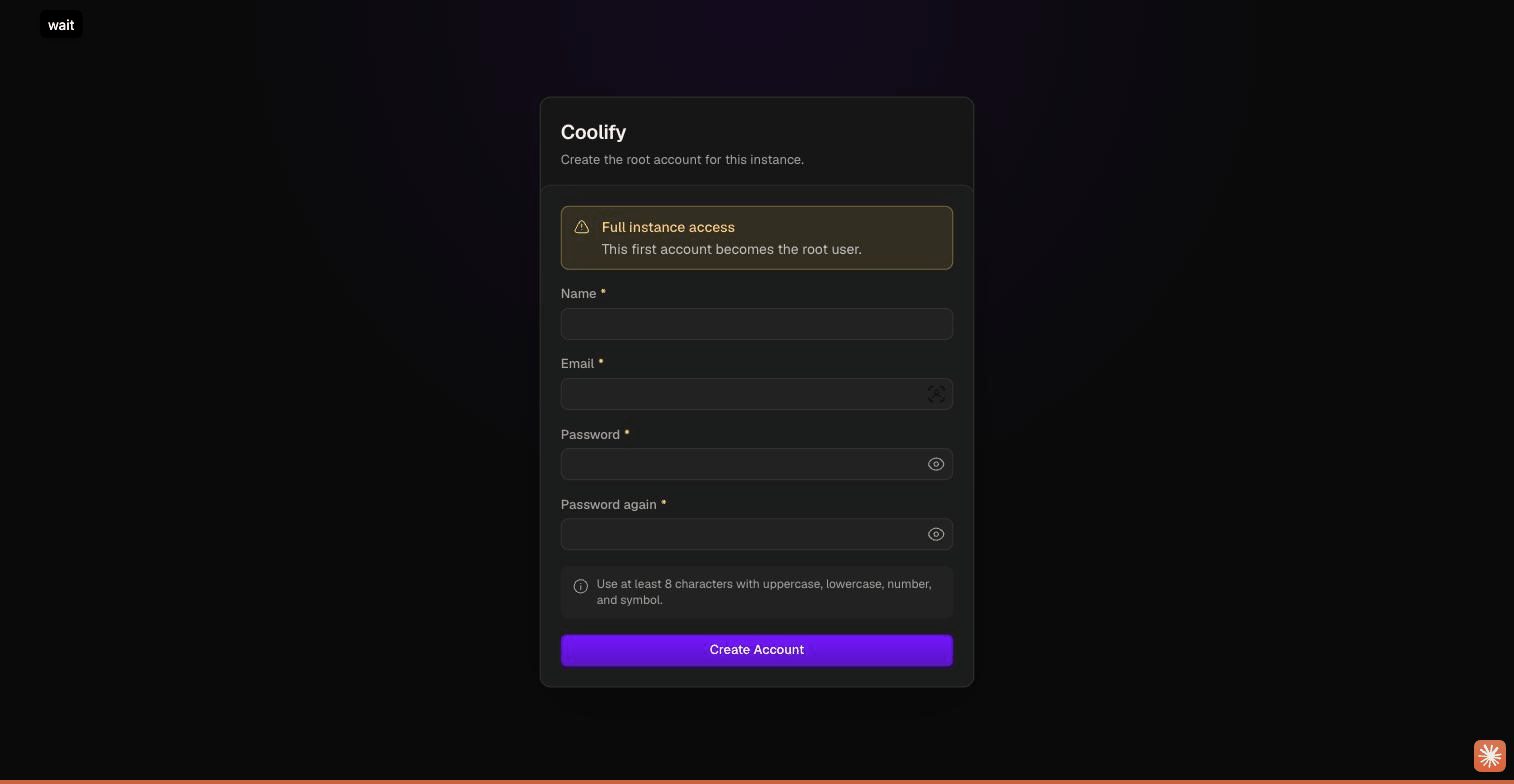
Open http://YOUR_DROPLET_IP:8000 in a browser. The first screen creates the root user; do this straight away, because until you do, anyone who finds the port can.
After the account, a three-step onboarding wizard asks where to deploy. Pick This machine (the droplet itself); Coolify connects to it over its own localhost SSH key, checks that Docker is running and creates "My first project" with a production environment. The wizard offers to provision new servers on Hetzner, Vultr or DigitalOcean from inside Coolify, which is how you add a second box later.
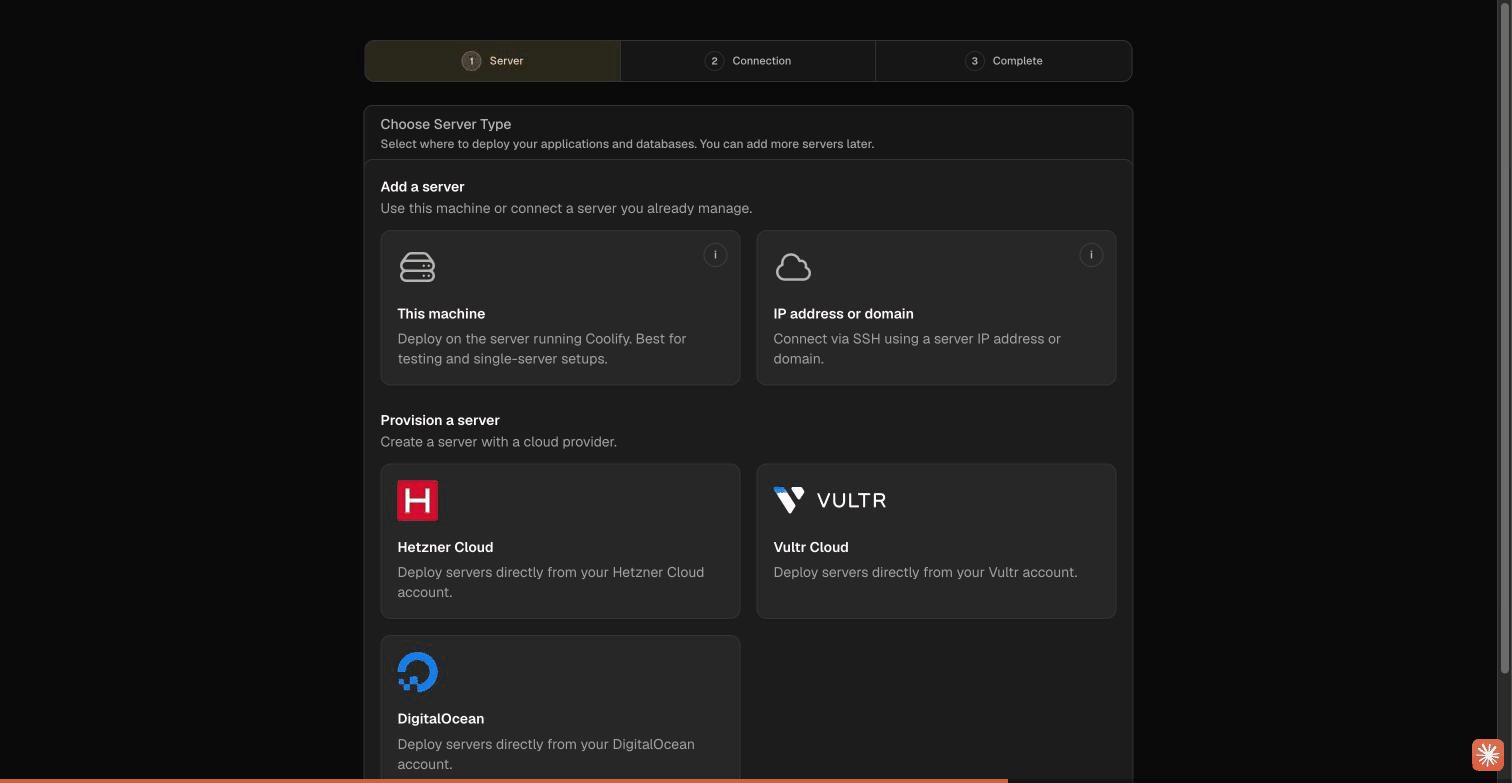
The whole wizard is four clicks and took us under a minute; it ends on a "Setup complete" screen with the server, the project and the Docker engine all green, and a Deploy Your First Resource button.
Step 5: deploy your first app
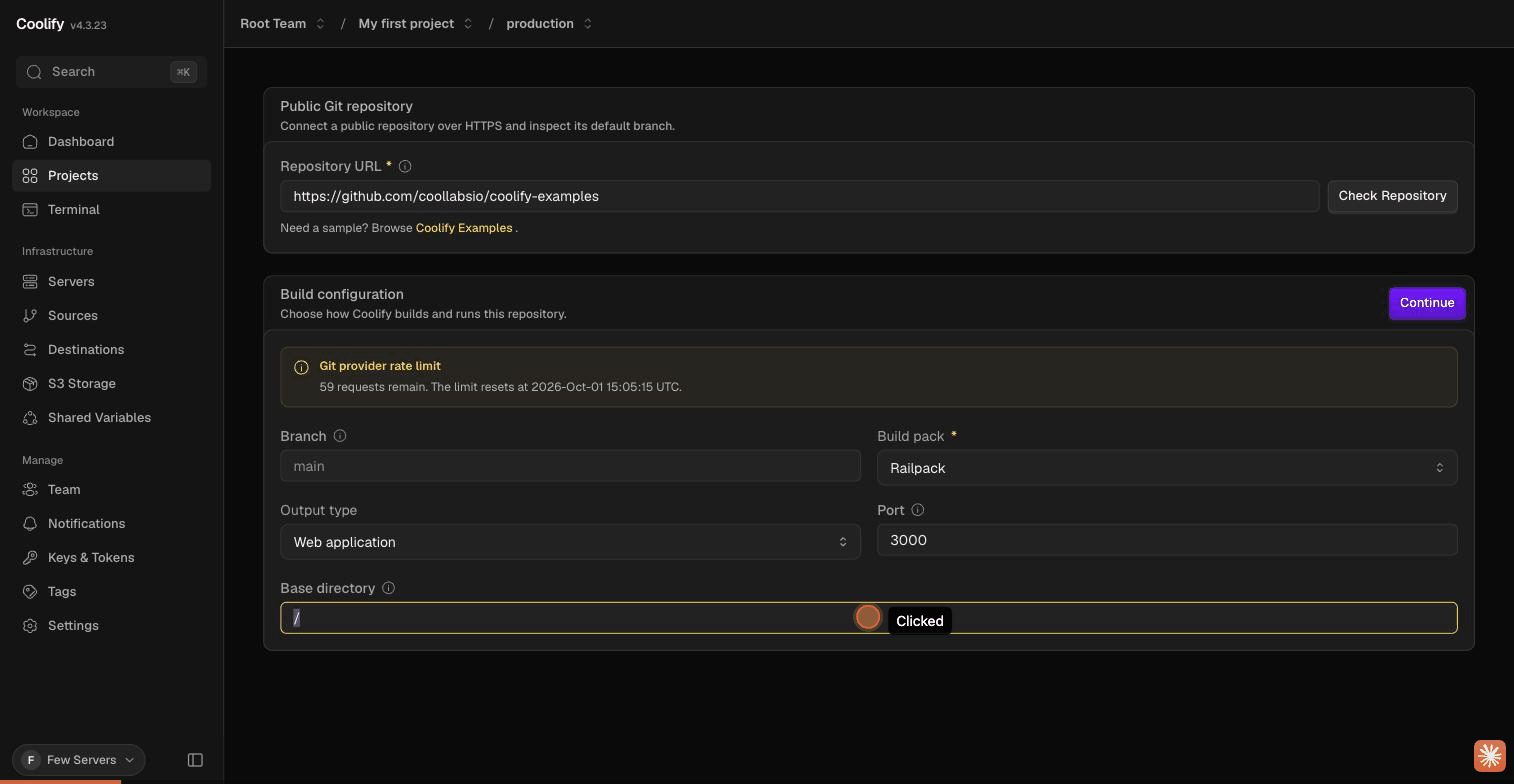
The resource picker lists a few hundred one-click services (Sonarr, Plausible, n8n, Uptime Kuma and so on) plus the generic sources: public Git repository, private repository, GitHub app, Dockerfile, Docker Compose, Docker image. We chose Public Git Repository and pointed it at Coolify's own examples repo, https://github.com/coollabsio/coolify-examples, with the base directory /javascript/runtimes/nodejs (a tiny Fastify server on port 3000). Coolify inspects the repo, proposes Railpack as the build pack and shows the branch, port and base directory for review.
Click Continue, then Actions → Deploy. The deployment log streams live:
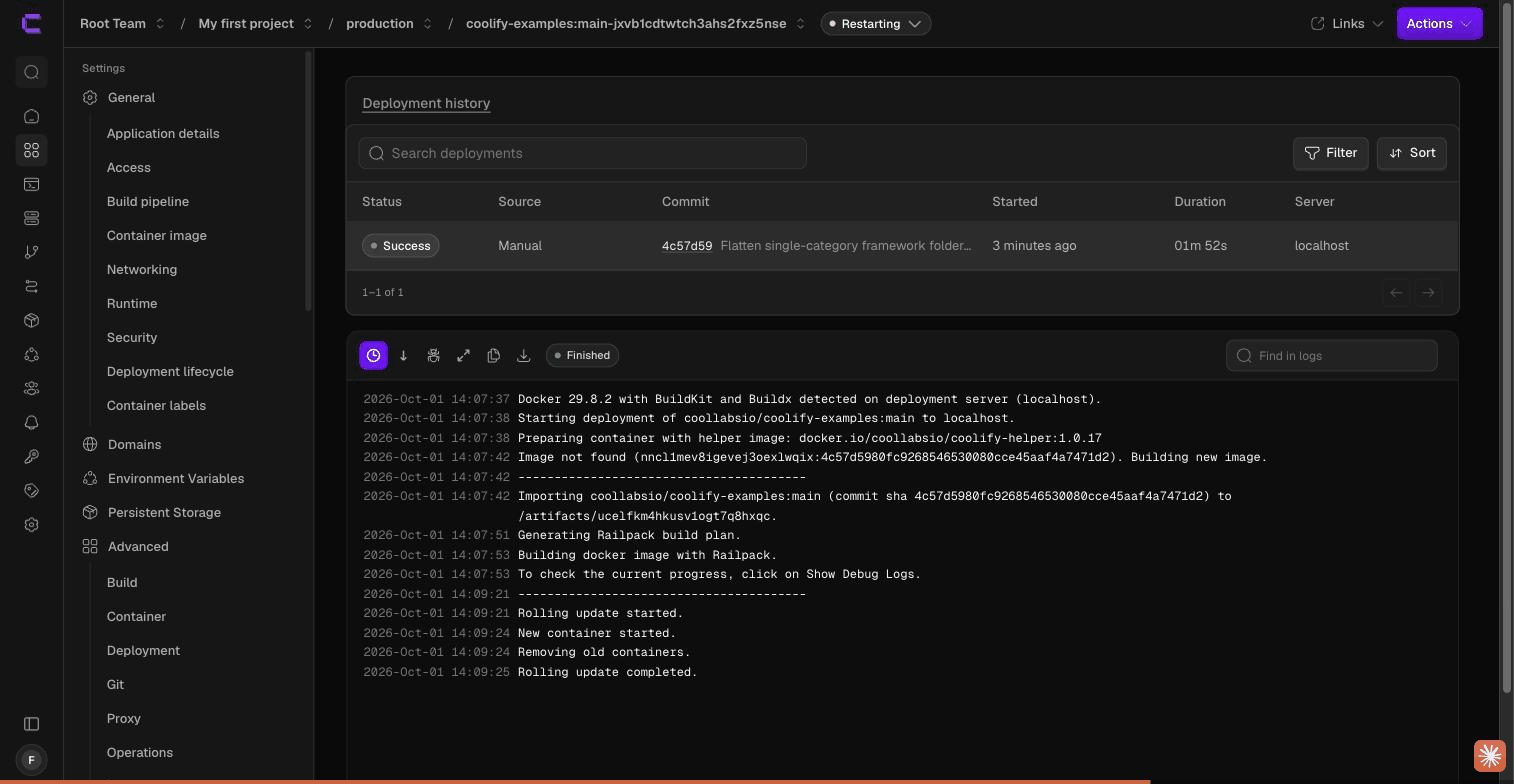
We timed it from the Deploy click to the first HTTP 200 from the public URL: 210 seconds. That breaks down into about 100 s of pulling the Railpack builder and Node base images (first deploy only; later deploys reuse them), 60 s of npm install on a 1 vCPU, and 20 s to start the container and for Traefik to pick up the route. The second deploy of the same app took 1 min 52 s.
Coolify gives every app a working URL immediately, on the free sslip.io wildcard DNS: http://<app-id>.64.226.72.55.sslip.io. Ours answered {"hello":"from nodejs #2"}.
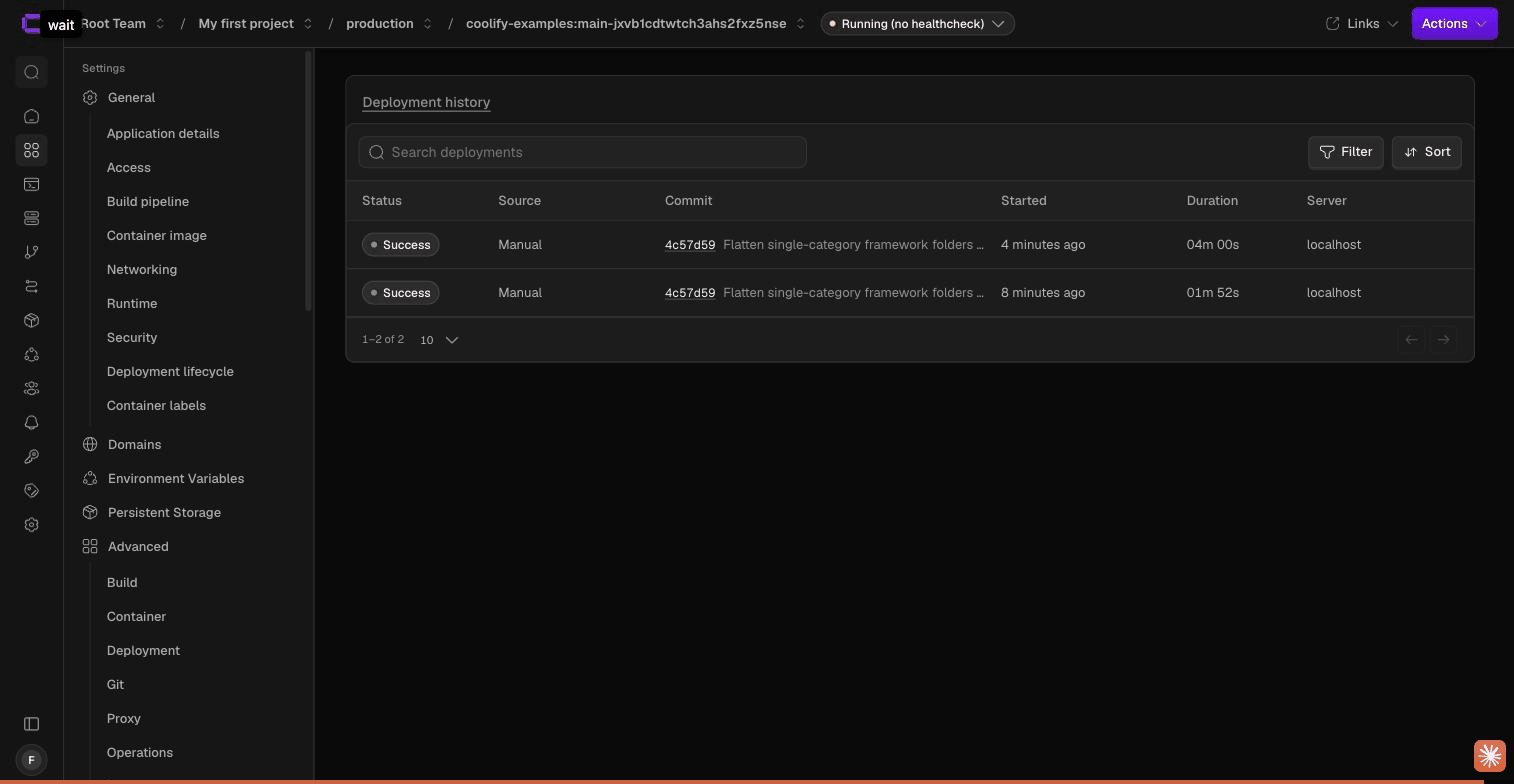
One honest mistake worth recording: on our first attempt we typed the base directory as /nodejs (the folder had moved in the repo). Railpack happily built an image from an empty directory, the deployment reported Success, and the container then restarted every few seconds because it had nothing to run. Check the runtime logs after your first deploy, not just the green badge.
What the build did to a 1 GB server
This is where the swap file earns its keep. Our sampler logged memory every five seconds during the build:
| Moment | RAM used | Swap used | Load (1 vCPU) |
|---|---|---|---|
| Idle, Coolify only | 618 MB | 32 MB | 0.5 |
npm install running | 765 MB | 498 MB | 4.2 |
| Image export, peak | 720 MB | 669 MB | 7.0 |
| App running, 5 min later | 648 MB | 478 MB | 0.4 |
Without the 2 GB swap file, the peak would have been about 1.4 GB of demand on a 961 MB box: the kernel's OOM killer would have taken out either the build or Coolify's own database. With swap, the build was slow (load 7 on one core) but finished. The Fastify app itself uses 31 MB.
Is 1 GB enough? The verdict so far
Resident memory per container after the deploy, from docker stats:
| Container | Memory |
|---|---|
| coolify (the app) | 150 MB |
| coolify-proxy (Traefik) | 38 MB |
| coolify-realtime | 25 MB |
| coolify-db (Postgres) | 23 MB |
| coolify-sentinel | 9 MB |
| coolify-redis | 7 MB |
| your app (Fastify) | 31 MB |
| Total | 283 MB |
Coolify's own footprint is about 250 MB; the rest of the "used" figure is the kernel, Docker and page cache. Disk after one build: 11 GB of 24 GB (base images and the build cache are the bulk; Coolify's cleanup job reclaims the cache weekly).
So: for one or two small apps, a static site, or a private tool, the $6 droplet with swap is fine and we are leaving ours running. We will update this section with the 7-day numbers (memory trend, swap, any restarts) once we have them.
What the $6 plan cannot do
- Build large Node or Rust projects on the server. Builds are the memory peak; for anything heavier than a static site or a small Express/Flask app, build elsewhere (GitHub Actions) and have Coolify pull the image.
- Run a database per app comfortably. One Postgres is fine; three is not.
- Survive a traffic spike without swapping. If an app matters, the $12 plan (2 GB) is the realistic minimum and still far cheaper than one Heroku dyno.
Cost comparison
| Option | Monthly | Notes |
|---|---|---|
| DigitalOcean $6 droplet + Coolify | $6.00 | Unlimited apps within the box, your own domain, free SSL via Traefik |
| DigitalOcean $12 droplet + Coolify | $12.00 | The comfortable size for a small team |
| Heroku Eco dyno | $5 per app, sleeps | One app, sleeps after 30 min idle |
| Render starter | $7 per service | One service |
| Railway hobby | $5 + usage | Usage-based |
For a team running three or four small services, a single Coolify box replaces $20-40 of PaaS fees. The trade: you own the updates and backups.
FAQ
Does Coolify work with 1 GB of RAM?
Yes, with a swap file. Coolify's own containers use about 250 MB; the problem is the build step, which peaked at 720 MB of RAM plus 669 MB of swap in our test. Without swap the kernel kills a container during the first real build. With a 2 GB swap file the build is slow but completes.
How long does the Coolify install take?
172 seconds on a $6 DigitalOcean droplet in Frankfurt, measured from running the official install script to the "Your instance is ready" message. Most of that is installing Docker (57 s) and pulling the Coolify images (109 s).
How much does it cost to run Coolify on DigitalOcean?
$6.00 a month for the droplet ($0.009 an hour), plus $1.20 a month if you turn on weekly backups. Coolify itself is free and open source. There is no per-app charge, so the cost does not change when you add a second or third small app.
Should I use the $4 droplet instead?
No. The $4 plan has 512 MB of RAM and 10 GB of disk; Coolify's images alone used 7 GB in our install and the four core containers need more than 512 MB before any app runs.
Which plan for a small team running several apps?
The $12 droplet (2 GB RAM, 50 GB SSD) is the realistic minimum once you run three or more services or any database next to your apps. It is still far cheaper than one dyno or service on a hosted PaaS.
Next steps
- Point a domain at the droplet and set it in Coolify's settings; Traefik issues Let's Encrypt certificates automatically.
- Enable DigitalOcean's weekly backups ($1.20/month on this plan) or Coolify's own S3 backups.
- Read our Coolify vs Dokploy comparison once it is published; both ran on this same droplet.